Showing posts with label mains. Show all posts

Tuesday, November 26, 2013

Spectacular Spanakopita

With the holiday season right around the corner, I like to think about dishes that can serve multipurposes. Spanakopita, the traditional Greek spinach pie is one of those ideal dishes. Make small ones and they make great appetizers or larger ones that make great entrees especially when served with a salad. You can make these ahead of time, freeze them, and they will be ready to pull out when company comes.    

Ingredients:
2 packages (448 g each) cooked frozen spinach, thawed
2 medium onions, chopped finely
2 Tbsp garlic, minced
250 grams feta cheese, crumbled
1/4 Cup chopped fresh dill
2 Tbsp dried basil leaves
2 large eggs
3 Tbsp olive oil
6 Tbsp butter, melted
1 package filo pastry, thawed

Directions: 
Preheat oven to 375°F.
1. in a large frying pan, heat olive oil and saute onions for 5 minutes until soft and slightly browned. Add garlic and cook for an additional minute.
2. Squeeze all the excess water from the spinach and then add to the pan and stir to combine. Take the pan off the heat and let cool for about 5-10 minutes.
3. To the pan add the crumbled feta, fresh dill and basil. Taste the mixture and add salt and pepper as desired. (we find some feta very salty and the mixture might not require additional salt.
4. Crack eggs into a bowl and scramble lightly.  Add eggs to the mixture and stir to combine. Put this aside until you are ready to make the spanakopitas.
5. Melt the butter in a small bowl, and unroll the filo pastry carefully and cover with a slightly damp towel.
6. Take 1 phyllo sheet from stack and arrange on clean, dry, work surface with the short side nearest you (keeping remaining sheets covered) and brush lightly with some of the melted butter. Put a second sheet on top of the first and brush with more butter. Add a third sheet, but do not add more butter.
7. If making lunch sized spanakopitas, cut the stack in half lengthwise, if making appetizers, cut the stack in 3 strips. A pizza cutter or long chef knife works best.
8. For lunch sized, use approximately 2/3 of a cup of filling near 1 corner of a strip on the end nearest to you, for appetizers, use approximately 2 tablespoons of filing.
9. Fold the corner of phyllo over to enclose filling and form a triangle. Continue folding strip (like a flag), maintaining triangle shape. Don't worry about any funny ends, you can stick them down with a little butter.
10. Put triangle, seam side down, on a large baking sheet covered in parchment and brush top with butter. Make more triangles in same manner, using all of the phyllo.
11. Bake triangles in middle of oven until golden brown, 20 to 25 minutes. Serve hot or room temperature.

If you want to freeze them for later use, do not brush the top with butter before freezing. Freeze individually on a cookie sheet then transfer to an airtight container until needed.  Before baking, thaw and then brush with butter before baking.


Monday, March 4, 2013

Fettuccine with Prawns in Garlic Wine Sauce

According to rumours, spring is around the corner. The days are getting longer, its getting warmer (OK only a little bit so far) there have been breaks in the endless rain and the sun has peeked out from the clouds (OK only twice in a week, but I will take what I can get) and it is time to start thinking about getting outside more often, and looking for tasty recipes that are less time consuming and heavy. Best of all this recipe only takes 10 minutes from start to finish.

I am a full fledged member of the carb lovers club, and firmly disagree with the idea that all pasta dishes are heavy. Seafood, garlic and wine are natural partners that allow this sauce to be light and refreshing and a brilliant change of pace from heavier tomato or cream based sauces. For this recipe we used 20/30 sized prawns, but clams, mussels, shrimp, or calamari would also be excellent choices.

Now I know that many great chefs and foodies say that cheese and fish or seafood don't mix, and as a general rule I agree, but for this recipe the small amount of parmesan cheese adds a little richness, some much needed salt, and body to the otherwise very light sauce.

Serves 4.

Ingredients:
1 pound of fettuccine, preferably fresh
1 pound of raw prawns, peeled and deveined
1/4 cup of olive oil
2 tablespoons of butter
2 tablespoons garlic, finely minced
1/2 cup dry white wine
1/2 teaspoon dried chili flakes
3 tablespoons parsley, finely chopped
1/8 cup parmesan cheese, fresh grated
1 teaspoon lemon zest
1/4 cup lemon juice
Salt and pepper to taste

Directions:
1. Put a large pot of well salted water for the pasta on the on the stove and bring to a rolling boil.
2. In a large saute pan, add oil and heat over medium high heat, add butter. It should melt quickly and foam.
3. Add garlic to the oil and saute quickly, browning slightly (do not burn).
4. Stir in wine, lemon zest and lemon juice, bring up to a light simmer for 2-3 minutes.
5. Put the pasta in the salted water and cook till al dente, 4-5 minutes.
6. While the pasta is cooking, add the prawns to the saute pan. You want to cook for 2-3 minutes on each side or until they turn pink and opaque.
7. Add chili flakes, parsley, and cheese. Season well.
8. Drain the pasta, reserving approximately 1/2 cup of the pasta water. Put pasta and water back in the pot. Add the sauce and prawns to the pasta. Toss and serve immediately.


Friday, February 22, 2013

Braised Beef Short Ribs

Short ribs always seemed like a very complicated dish to me, I love them, but they always seemed too complicated to make at home, but that was before I did some research and read a lot of recipes and techniques. I prefer the robust french flavourings of wine, thyme, and bay leaves, but there are so many options to choose from from any ethnicity of cuisine. This recipe is based of several including one by Anne Burrell. They all call for the same basic elements. Brown meat, veggies for a flavour base, and a broth to braise the meat in. Once you pick those then you are pretty much guaranteed to have a successful dish.  

Serves 4-5.


Ingredients:
8 Bone-in short ribs (approx 3 lbs) - we prefer them in 4-6" lengths, not the 1-2" ones

4 Tablespoons olive oil
1 Large onion
3 Celery ribs
2 Carrots
2 Cloves garlic
6 oz Tomato paste
2 Cups red wine - we prefer a Cabernet Sauvignon
2 -3 Cups beef broth
3 Sprigs of fresh thyme
3-4 Bay leaves

Salt and pepper for seasoning

Directions:
1. Preheat the oven to 375 degrees.

2. In a large oven proof stock pot, add enough oil to coat the bottom of the pot and bring to a high heat.
3. Season the ribs well with salt. Sear the ribs until they are well browned, 2-3 minutes per side. Do in batches batches if necessary, do not overcrowd the pan. When browned, put ribs on a plate. Drain any excess fat.
4. Take all the veggies, and make them into a fine mixture, using a box grater or food processor.
5. Add fresh oil to the pot, and saute the veggies, until brown 5-7 minutes. Don't worry about it sticking to the bottom.
6. Add tomato paste, and cook out for 3-4 minutes.
7. Add the wine, scrape all the brown bits from the bottom of the pan, and reduce the wine by half, stirring frequently.
8. Add the short ribs back into the pot, and add enough beef broth to cover the ribs. Add thyme and bay leaves.
9. Bring the broth to a boil, then cover and put in the oven.
10. Braise for 3 hours, stirring occasionally.
11. Remove the lid and cook for an additional 30 minutes, to reduce the sauce and brown further.
12. Meat will be fork tender but not falling apart. Serve over mashed potatoes or pasta.


Tuesday, January 22, 2013

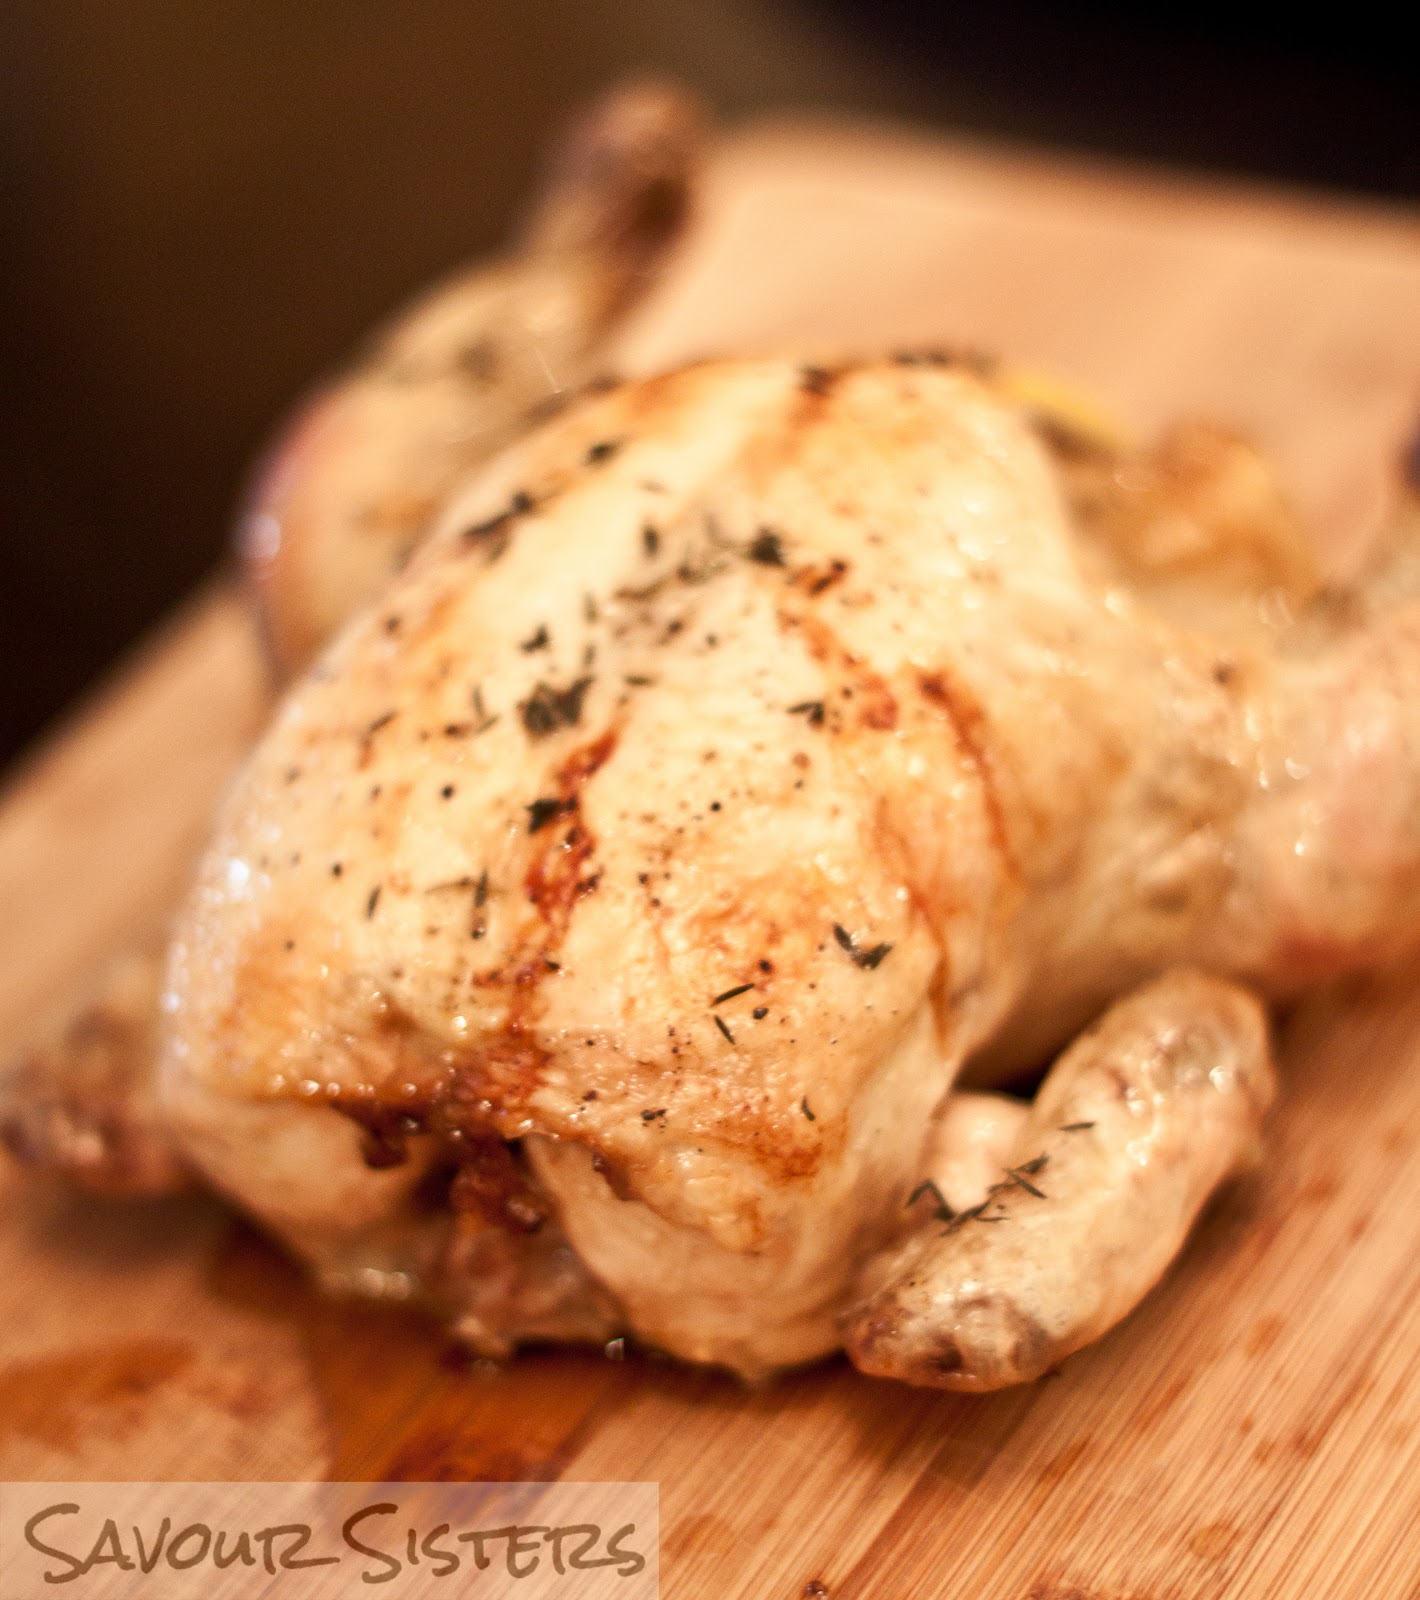
Lemon Garlic Roasted Chicken


In December, we did an interview for the online magazine Doctor's Wives Living, for whom we have been contributing recipes. One of the questions we were asked was "For people who do not cook regularly, what one dish they learn to make for a dinner party?" My answer was a simple roasted chicken, its easy, quick and always tastes good. Roast chicken is beautiful for homey dinners, or for fancy get togethers.

Ingredients:
1 roasting chicken (you can also use a fryer, but roasters are larger and more tender)
1 lemon, quartered
2 whole heads of garlic
2 tablespoons butter
3 sprigs of fresh thyme
salt and pepper

Instructions:
1. Preheat the oven to 350 degrees.
2. Take the chicken and check it for any residual feathers or fat around the neck and cavity.
3. Pat the chicken dry both inside and out. Salt and pepper the inside of the cavity.
4. Stuff the cavity with thyme, 1 head of garlic (cut in half crosswise), and lemon pieces.
5. Rub the chicken with butter, and salt and pepper liberally.
6. Place in a roasting pan or deep sided casserole dish.
7. Break the remaining head of garlic into cloves, leaving the skin on, and put in the bottom of the pan.
8. Bake the chicken, basting every 30 minutes, for 90 minutes, until juices run clear, or until the leg pulls easily when you pull on it.
9. Let rest at least 15 minutes before carving.

Tip: The garlic in the bottom of the pan will be beautifully roasted, and can either be used to further flavour the gravy. But it is even better if you squeeze it out of the skins and put it in your mashed potatoes, or just spread it on fresh french bread.  So awesome!!!


Monday, January 14, 2013

Breakfast Strata with Sausage and Cheddar

We know that January is supposed to be a time of restraint, and the beginning of new diet resolutions, but sometimes its important to have something delicious too. Maybe this recipe will fulfill your resolution to try something new, or to be less stressed when company is coming over. This is a simple but awesome brunch dish that can be made the night before and kept in the fridge. It also makes a great dinner for those nights when you can't think of what to make. It also uses up all those odd leftover things in the fridge cause you can add whatever you like, from different meats or veggies.

Serves 6.

Ingredients.
1 pound of mild italian sausage (you can also use breakfast sausage if you want something milder)
8 slices of stale bread (I used 10 leftover mini-croissants for this one)
1/2 onion, finely chopped
12 mushrooms, sliced
3 tablespoons italian parsley
1 cup of cheddar cheese, grated
6 eggs
2 cups milk
4 tablespoons dijon mustard
salt and pepper

Directions:
1. Remove the sausage from the casings, and brown in a shallow frying pan until fully cooked.
2. Drain and reserve the fat, put sausage in a casserole dish.
3. In a tablespoon of reserved fat, saute onions then mushrooms. When done, add to sausage meat.
4. Roughly cube the bread, chop parsley and toss with cheese and ingredients in the casserole dish.
5. In a medium bowl whisk eggs, milk, mustard, and a pinch of salt and pepper together.
6. Pour egg mixture over the other ingredients, sprinkle the rest of the cheese on top. Cover and refrigerate for at least an hour to overnight.
7. Take strata out of fridge 30 minutes before baking.
8. When ready to bake, heat oven to 350 degrees. Remove cover and bake approximately 50 - 60 minutes, until a knife inserted comes out clean, top is golden brown and puffed.
9. Let sit for 5 minutes before serving.


Monday, November 5, 2012

Savory Stroganoff

I don't know about where you live, but here in Vancouver, it has been raining non-stop for weeks. It is grey and dark and miserable. And when the weather turns like this each year it's time to pull out recipes that are warm and comforting and make your soul happy. 

A beautiful beef stroganoff is one of our favorite fall dishes of all time. Tender strips of beef and mushrooms cooked with onions and sour cream and served over noodles make up this classic recipe. The best thing about this dish is that because the meat is braised in the oven over time, you can use less expensive cuts of meat which have more flavour, and just need time for them to become tender. We used Top Sirloin, but stew beef would work just as well. 

What is your favorite comfort food? Let us know in our comments section below. 

Serves 6.

Ingredients:
3 pounds of beef (Top Sirloin, Round Steak)
1 large onion, diced
3 stalks celery, diced
1 cup mushrooms, sliced
1/4 cup Vegetable oil for sauteing, approx
4 cups beef broth
2 tablespoons Worcestershire sauce
1/4 cup tomato paste (you can use catchup in a pinch)
2/3 cups sour cream
1/2 cup flour
Salt and pepper
Broad egg noodles, cooked

Directions:
1. Slice the steak into thin strips across the grain. Strips should be 1/4" thick.
2. In a shallow dish or plate, put flour and add a pinch of both salt and pepper.  Dredge the meat in the flour mixture, shake meat to remove any excess.
3. In a frying pan, add 2 tablespoons of vegetable, add a single layer of meat, and brown both sides. Do not cook the meat through.
4. Put the browned meat into a large oven proof pot. Continue browning until all meat is done, add more oil as needed.
5. Saute onion, celery, and mushrooms in the same pan until translucent, and lightly browned. Add veggies to the meat.
6. Deglaze the pan by adding 1 cup of the beef broth and bring to the boil. Scrape any brown bits off the bottom of the pan. Add liquid to the pot.
7. Add the rest of the broth, Worcestershire sauce, and tomato paste to the pot. Put pot in oven with lid and bake for 1 1/2 - 2 hours, until meat is tender.
8. Put pot on the stove and bring stroganoff to a boil. Sauce may need to be reduced through boiling until it is the consistency of thick gravy.
9. Take stroganoff off the heat and add sour cream. Stir to incorporate. Season with salt and pepper as needed.
10. Serve on broad egg noodles.   

Quick Tip: To make the meat easier to slice, firm it up by putting it in the freezer for 30 mins - 1 hour.  

Monday, October 15, 2012

Rustic Potato Leek Soup

The weather has definitely turned here in the West Coast. Gone are the sunny brisk days that we had all the way into mid-October. We have finally set into real fall weather. The leaves have turned colours and have fallen to the ground, and when we think of what to have for dinner we start thinking of heartier meals that are warm and comforting.

Potato leak soup is one of those dishes that is really easy to make, and contrary to popular opinion, our version is very low in calories, as we only use a little milk to finish. The richness comes entirely from the starch in the potatoes for thickening.  Now what makes this recipe rustic? Simple actually, I don't have a blender or an immersion blender so getting the soup perfectly smooth just isn't possible. Plus, who doesn't prefer their soup to have a little texture?

Serve this with fresh cheddar biscuits. See the recipe here.Cheddar and Chive Biscuits

Serves 6.

Ingredients:
3 Tablespoons vegetable oil
2 Leeks
1 Medium Onion, diced finely
3 Stalks Celery, diced finely
1 liter Chicken Stock (home made or store bought)
6 Medium Yukon Gold Potatoes (1 - 1.5 Lbs), peeled and cubed
1/4 Cup Italian Parsley, chopped finely
1/8 Cup chives or green onion, chopped finely
1 cup 2% milk (you can add cream if you prefer it to be richer)
Salt and pepper to taste

Directions:
1.  In a large stock pot, add oil and heat over medium heat. Add chopped onion and celery and sweat for 5 minutes. Do not brown the veggies.
2. Trim the root end off the leeks and slice in half lengthwise.  Wash the leeks very thoroughly as there will be dirt. Once clean, slice the leeks finely and pat dry. Add to pot and continue to sweat the veggies for an additional 5 minutes.
3. Once all the veggies are soft and translucent, add the potatoes and stock. Bring to a simmer, and cook until the potatoes are well cooked, about 30 minutes.
4. Depending on how smooth you want your soup, puree with an immersion blender, pass through a chinoise, or mash with a potato masher.
5. Add more stock, or some water if the soup is too thick.
6. Add milk, herbs, and season with salt and pepper.
7. Let simmer for 5 more minutes, till hot through, and serve.

This soup can be made a day or two ahead and reheated. It may need some water or additional milk to thin it out. It does not freeze very well, as it tends to separate and looks less appealing, but even after freezing it tastes delicious.

Sunday, October 7, 2012

Turkey Pot Pie - The Leftover Edition


In our family we absolutely love turkey! It is not unusual for us to have a 20-24 lb turkey every Thanksgiving and Christmas. With that much turkey we were guaranteed to have lots of leftovers, but the question becomes what to do with it all? And what about all the extra veggies and gravy?  Well this is a really easy turkey pot pie recipe that uses up all those leftovers and tastes awesome.  

Unlike most pot pie recipes, we don't make a cream sauce, ours uses leftover gravy, stock and milk for lots of natural flavour and none of that gloppy texture.  Feel free to add your own favorite fresh herbs and whatever other veggies that you like. 
Serves 4.

Ingredients:
3 tablespoons vegetable oil
1 medium onion, chopped
3 stalks celery, chopped
3 tablespoons flour
1 cup stock (turkey or chicken)
1 cup milk
1 cup turkey gravy (leftover or purchased)
3 teaspoons tarragon
3 tablespoons fresh parsley
2 teaspoons oregano
3 cups of cooked, cubed, turkey
2 cups fresh / leftover veggies (carrots, peas, broccoli, beans)
1 piece puff pastry, thawed
1 egg whisked for egg wash.
Salt and Pepper

Directions:
1. Heat oven to 350 degrees.
2. In a large saute pan, heat the oil over medium-high heat. Add the onion and celery and saute until translucent. Do not brown.
3. Sprinkle the flour over the sauteed veggies, stir combining the flour into the oil. Cook for 2-3 minutes, making a roux.
4. Add the stock and milk, stirring frequently until the sauce has thickened.  Add the gravy, stir to combine. If the sauce is too thick add either stock or milk to thin.
5. Add the herbs, and season the sauce with salt and pepper to taste.
6. Add the turkey and veggies to the the sauce, stir to combine. Let simmer on min, while you prep the pastry.
7. On a lightly floured surface, roll out the puff pastry to 1/4" thick.
8. Put the turkey sauce mixture into a casserole dish.
9. Lay the pastry over the casserole dish, tucking the pastry around the filling. Trim the edges of the pastry, leaving a margin of 1" or so over the edge.
10. Brush the pastry with an egg wash and pierce the pastry for the steam to escape.
11. Bake approximately 45-50 minutes, or until the pastry is golden brown and the filling is bubbling.
12. Let the pie set for 5 minutes before serving.

Tell us..What is your favorite part of Thanksgiving? Any special family recipes?

Saturday, August 11, 2012

Hardcore Prawns

Looking for a perfect dish to serve for friends sitting on the patio with a glass of wine, or a great side to go with salad?  These prawns are spicy and mouthwatering.  We prefer using fresh prawns, size 20/30 peeled and deveined. Larger prawns are delicious too, but tend to be less sweet. We also put this marinade on scallops and cook them under the broiler.
Ingredients:

1 lb raw prawns, peeled and deveined
1/3 cup lemon juice
1 tablespoon lemon rind
2 tablespoons minced garlic
1 tablespoon chili flakes
1 1/2 tablespoons cayenne powder
Salt and Pepper
Bamboo Skewers 

Directions:
1. Heat BBQ to 350 - 400 degrees.
2. In a shallow baking dish soak the skewers in water for 30 minutes
3. Thread 4-5 prawns onto each skewer, by piercing the skewer through the body and tail. Check prawns at this time to make sure all of the intestinal vein has been removed. Rinse in cold water if required.
4. Put the skewers on a plate and mix remaining ingredients into a small bowl. Pour the marinade over the prawns ensuring even coverage.
5. Let sit for a maximum of 30 minutes, as the acid in the lemon juice will start to cook the prawns.
6. Put skewers on the BBQ, and grill 2-3 minutes on each side until the prawns have turned pink and are no longer translucent.


Sunday, July 29, 2012

Just for the Halibut

We love fresh halibut! The firm white meat is low in fat and full of flavour. With this recipe we didn't want to cover up the natural flavour of the fish, but instead bring in other flavours that are complementary. You can either bake the halibut, pan fry it, or our personal favorite, barbeque it.

Serves 4.

Ingredients: 
4 Halibut fillets (approx 6 oz each) preferably with skin
1 cup of dry white wine
1/4 cup of dijon mustard
2 teaspoons of minced garlic
1/4 cup of chopped italian parsley
2 green onions finely chopped
Salt and Pepper to taste

Directions:
1. In a bowl, add all ingredients except Halibut and mix together well.
2. Lay fish into the bowl, and turn to coat.
3. Let sit in the marinade for about 30 mins.

Note: If you let the fish sit too long, the the marinade will start to cook the fish.

4. Heat the BBQ to 400 degrees and lightly oil the grill with vegetable oil.
5. Put the Halibut on the grill skin side down. Cooking time will vary depending on how thick the fillet is. A 1" fillet will take approximately 10 minutes. The fish is ready to eat when it is opaque through the middle and flakes easily. Flip the fish once only as it breaks apart easily.


Tuesday, July 3, 2012

"Q-ing" up Dinner

Are you tired of thinking about what to have for dinner?  Sick of making a ton of dishes and mess? Having last minute company and don't want to spend your evening cooking and cleaning? 

We love this meal! It is super easy and takes almost no time and has no clean up.

TIP:
The secret to the success is that you bake the chicken in the oven before your guests arrive. 

Barbecued Chicken Legs With Grilled Corn and Asparagus.
Serves 6
For the chicken:
  • 6 chicken legs - skin on (breasts work as well if you prefer)
  • Salt
  • Pepper
  • Your favorite BBQ sauce (see Product Reviews and Tips for a review of our new favorite)
Directions:
1. Place chicken in a baking dish, (we prefer using a 9 x 13" pyrex cake pan)
2. Salt and pepper lightly.
3. Bake chicken at 350 degrees for approximately 30 minutes or until just cooked and juices run clear. 
4. Take out of oven, and let rest for 10 minutes. (You can do this step in advance, but cold chicken will take longer to grill)
5. Coat the chicken in your favorite barbeque sauce, and place on the grill.
6. Barbeque until the chicken has grill marks and the sauce is caramelized. ( 5-7 minutes)  

For the corn and asparagus:
  • 6 ears of corn (husked)
  • 2 bunches asparagus (not too thin)
  • Salt
  • Pepper
  • Olive Oil
Directions:
1. Wash and dry the vegetables, trim asparagus.
2.  Coat lightly with olive oil, sprinkle with salt and pepper.
3. Place on grill, turn occasionally to create grill marks. (3 - 7 minutes depending on grill temperature)

Note: Both corn and asparagus cook quickly, and you don't want to overcook them. Asparagus should still be crisp, and corn just required warming through.

Also try: coloured peppers, tomatoes, zucchini and mushrooms.
For added zip, drizzle veggies with balsamic vinegar.